
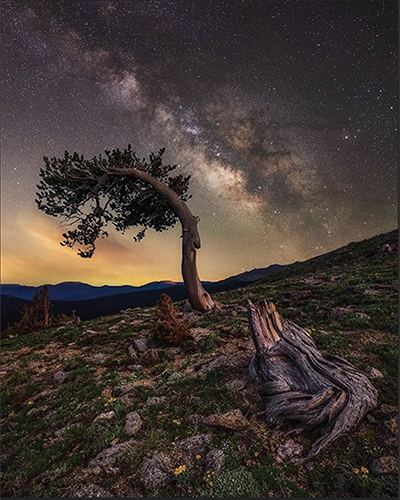
LTPC member Darren White hosts a Night Photography Outing on Mount Blue Sky on Sunday evening, September 6, 2026. Meet at Echo Lake on Mount Blue Sky at 6:30pm. This will be our base location and we’ll go as a group from here. This outing will take place without a moon in the sky. The moon will not rise until 2:18am on Monday morning. This will give us a great opportunity to capture the sky without any additional light. Being this close to Denver there will be some light pollution as expected. Being up so high also helps to minimize this and the sky is fairly dark on the mountain.
 Registration required
If you are interested in attending, please Register Now. LTPC asks for a $15 per person donation to compensate Darren for his time and expertise.
Car Pooling
If you want to carpool or are willing to drive please Fill Out this Form
What to Wear: Please dress or be prepared with warm winter clothes… I’d highly suggest some type of gloves, stocking hat, warm jacket and warm pants.
It can get chilly fast once the sun goes down. Bring more, not less.
What to Bring: Camera, lenses, media cards, at least 2 batteries, tripod, cable release/remote cord & positive attitude.
Suggested Gear: Please do not go buy new gear just for this outing… If you wish to rent gear I’d suggest Lens Rentals
- 1 DSLR or Mirrorless camera
- Wide Angle lens in the 14-24mm range, prime or zoom with a 2.8 or wider F stop. If you only have an F4 lens that will work too ( I’ll touch on this more later)
- A 35mm or 50mm lens too IF you have one…<l/i>
- At least 2 batteries fully charged, 3 or 4 will be optimal. This will depend on how well your batteries do in cooler weather.
- Remote cord or cable release. We will be doing sequence shooting and this will come in handy. If you are experienced in shooting with your camera’s interval shooter then a cable release may not be needed.
If you need a cable release I recommend the Vello RS series – They are about $10 and super easy to use.
Find the right one for your camera at Vello and then go to B&H Photo Video and enter the model number to find it and buy it. - Tripod – Please bring the sturdiest tripod you have. I can’t stress this enough. Those little Mefoto type tripods are very prone to shaking due to wind. Try to avoid those kind if possible.
- Your media cards don’t need to be super fast, just make sure you’ve got enough to shoot as much as you want.
What to expect: In the field we will take advantage of the sunset time – allowing you to do your thing and ask questions if they come up. After sunset while we wait for about an hour till the stars come out I’ll go over some topics like – focusing in the dark, proper exposure, composition, choosing the correct ISO, how to shoot long exposures for star trails without trying to guess what the exposure should be. Once the stars come out and we’re in a good location we’ll start shooting. I’ll walk around and help those who have questions, check the back of your camera and make sure you’re on the right track.
Even if this is your first experience with Night Photography, please let me guide you to help you get the best possible outcomes from the night. It’s extremely rare that I ever do single exposures and call it good. 99.99999% of my night photography is done with multiple images. Either for the sky and foreground or just the sky. The reason for this is simple. I have not found ANY noise reduction program that is able to keep the stars sharp and pinpoint using just a single exposure. During the outing I’ll continually suggest shooting at least 10 images in sequence to stack for noise reduction. Even if you don’t have the software to stack, please just shoot the pictures and I’ll stack them for you…
How do we do this? Once you’ve taken your test shots, I’ll ask that you take a black frame. Then start shooting the sequence… with your camera on continuous mode, just press the shutter and lock it and let the camera do the work. After at least 10 images, release the shutter and take another black frame. The reason we do this is so when you’re back home looking at images, it’s super easy to identify which images will be used for stacking. This eliminates adding in your test shots and screwing up the stack. The images need to be back to back with the shortest amount of time between images.
After the outing I’ll share some post processing videos to help you out… Please remember that you can always ask me questions before, during or after the outing and I’ll be happy to answer them.
If you’re not super familiar with your camera, I’d suggest learning where the buttons are for ISO, F Stop, Shutter speed and drive modes. It’s a lot different in the dark than it is in the daylight…
Last but not least – because we will be in a group setting, headlamps generally won’t be needed as we won’t be walking far… If you need a headlamp, please feel free to bring one, just make sure NOT to use the red light option and keep it on the lowest setting. While red lights can be good for times when you’re not shooting, when the shutter is open you never want to use red lights… Personally, I just use the light on my cell phone if I need a little light. This way it doesn’t impact others around me.
